If you’re reading this, you likely already know Google Analytics is updating to GA4 technology and the old Universal Analytics will be retired July 1, 2023. Google is going to continue to share the data collected prior to this turnover date. However, it’s important to get GA4 installed on your website and ensure all the metrics are working before it’s lights-out on UA.
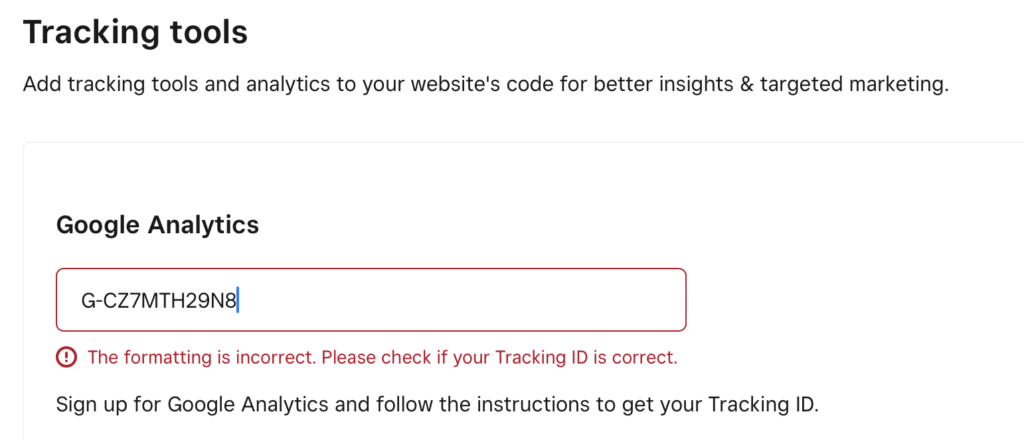
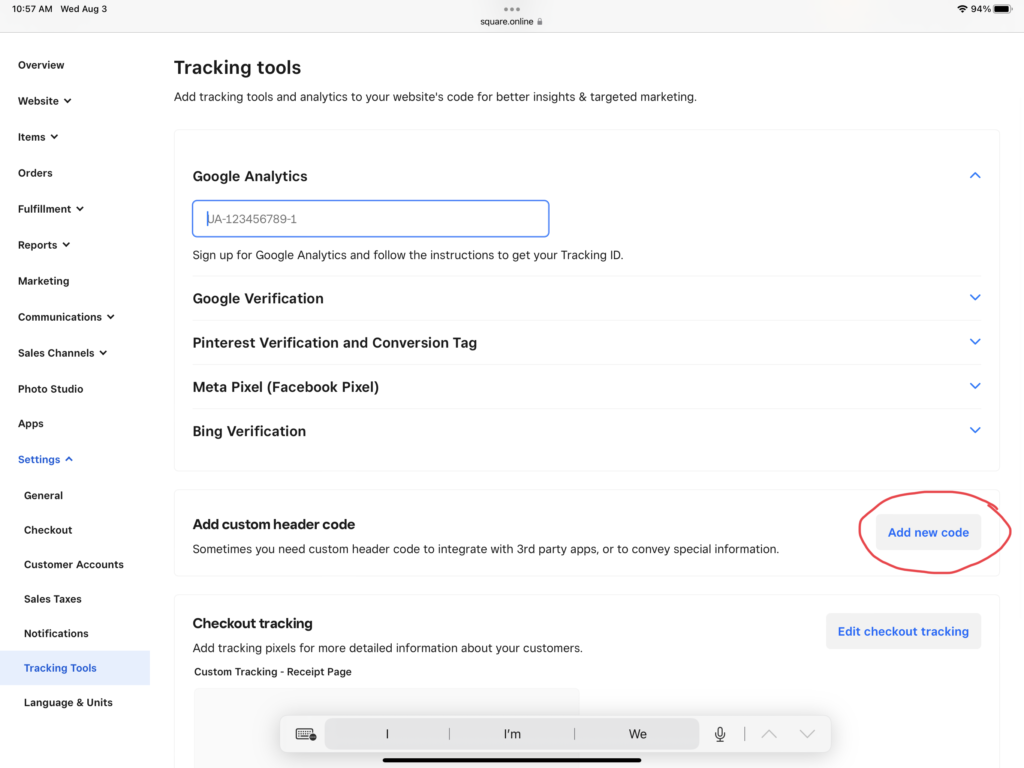
As of August 2022 SquareUp’s Google Analytics tracking set-up wizard still doesn’t recognize the new GA4 tracking code. It displays an error saying the tracking code formatting is incorrect. We didn’t bother to test if it works anyway, but instead opted to solve this by instead installing it as a custom tracking code a little further down the page.
Step 1: Set Up Google Analytics
The first step to installing Google Analytics on your SquareUp e-commerce store is to Create a Google Analytics account if you don’t already have one. You’ll want to follow the prompts to complete a few set-up steps for your website:
- Set up a Google Analytics User Account
- Create an ”Account” that keeps your website properties organized
- Create a new ”Property” within a designated account for your website or unique URL
- Add your webmaster, developer, or marketing team as users with appropriate permission levels
Step 2: Find Your Unique Tracking ID
Once you have your website set up as a Google Analytics property, it will display your streaming details. If you don’t see this or accidentally clicked away, don’t fret. You can find these unique tracking details by navigating through the menu.
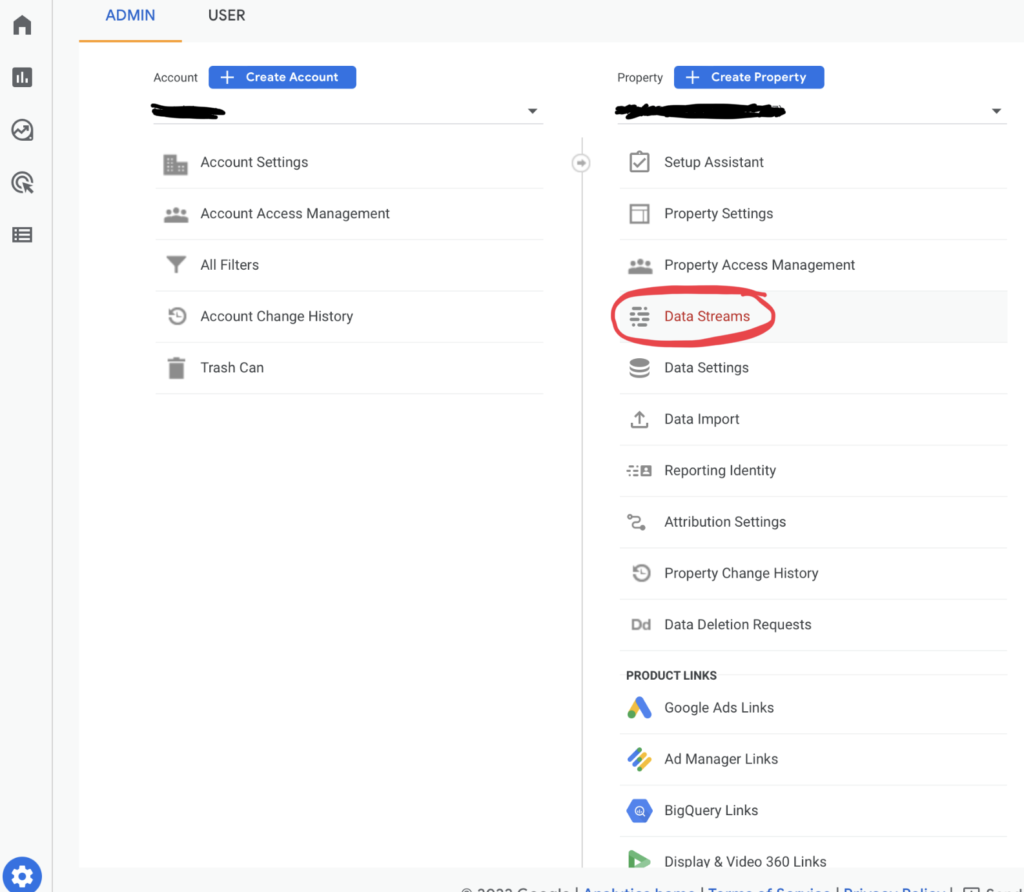
- Start by clicking on ADMIN in the lower left-hand corner. If the menu is reduced this may look like just the gear icon.
- Then select the correct ACCOUNT from the dropdown list in the left column. You may only have access to the one you’ve just created, in which case it may already be selected.
- Next, select the correct PROPERTY from the dropdown in the middle/right column.
- After you have the correct property selected, click on DATA STREAMS. If this is not yet set-up, create a new stream and follow the prompts to add a ”web” stream and input your URL.
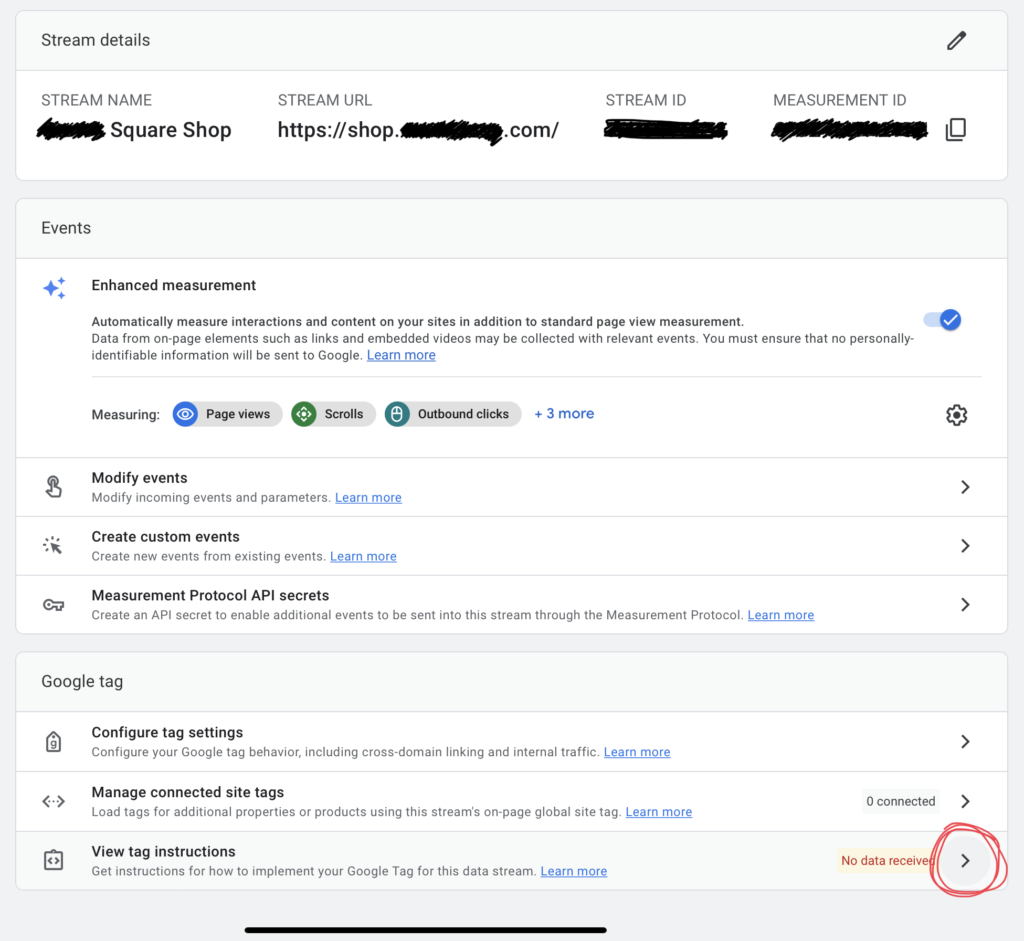
- Select the desired data steam/click on it. It will pop-up with a panel from the right-hand side that includes some details. This is where we snagged our unique tracking ID (aka Measurement ID) from the first time.

Step 3: Install Custom Tracking Code on SquareUp
Once you’ve located your unique Tracking ID, also known as your Measurement ID, for your unique data stream in Google Analytics, you’ll want to install the correct tracking code on your SquareUp Online E-commerce store account. This adds code inside the <head> tag of your website to connect the website to the Google Analytics services. Hopefully Square will fix the error message soon to recognize the new GA4 measurement IDs. Until then, we recommend adding the necessary tracking code using their custom header code option. Start by going to the Tracking Settings found in your square account by going to Ecommerce > Online > Settings > Tracking Settings
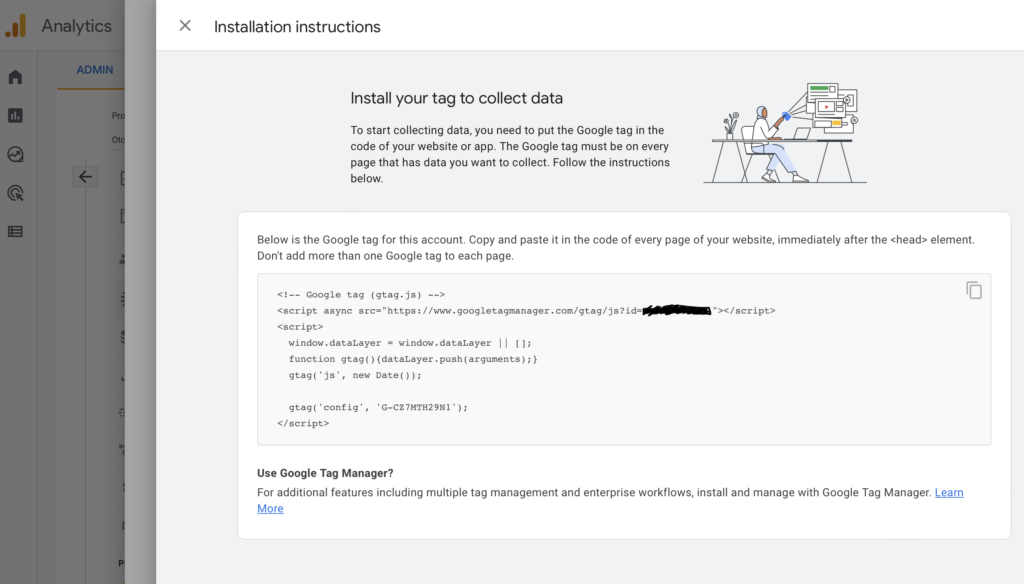
- Copy the code from the Tag Instructions found at the bottom of your data stream details in Google Analytics.
- Click Add New in Square Tracking Settings > Add Custom Tag
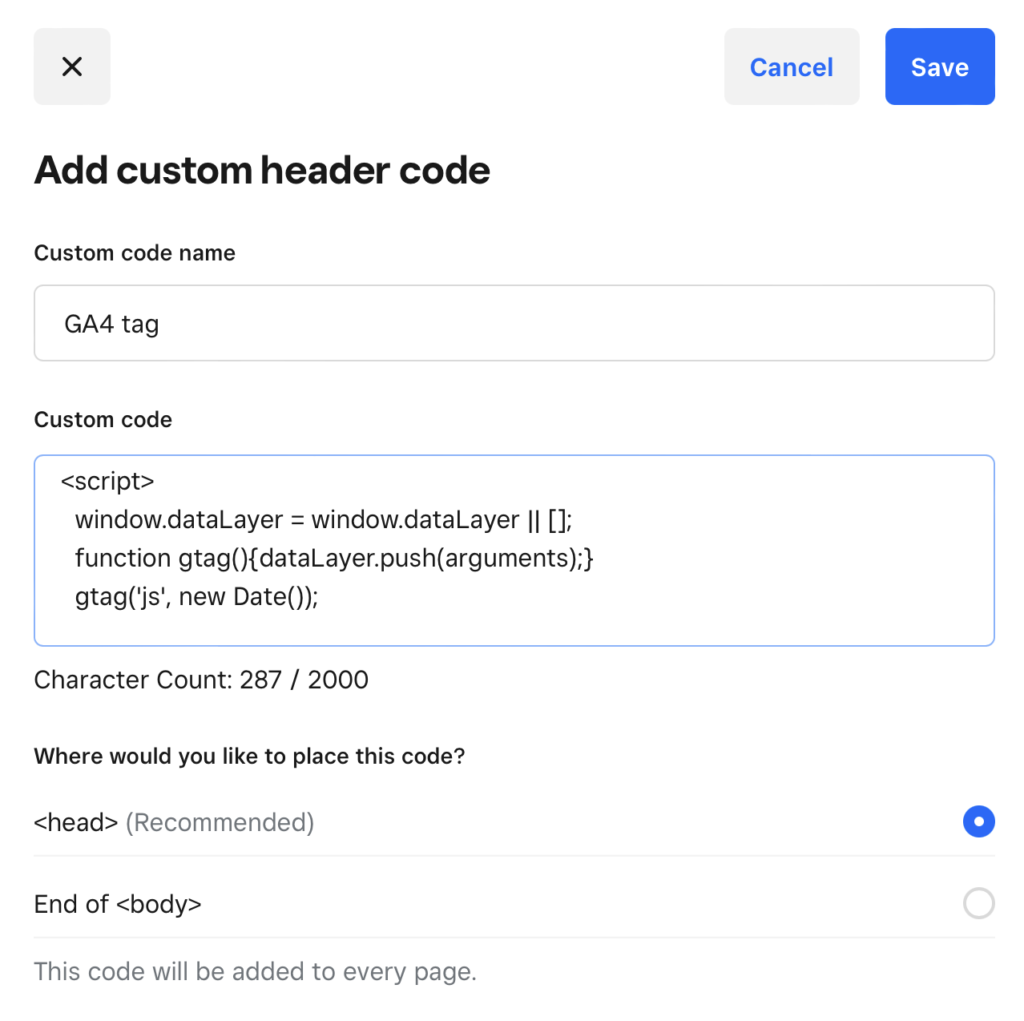
- Name your custom tag. We recommend something like ”GA4 tag” or ”Google Analytics 4 tag”.
- Paste your tag code.
- Make sure inserting the tag inside the <head> tag is selected.
- Click Save.
Step 4: Check the Tracking Code in 24-48 hours
Although tracking should begin ”instantaneously”, it can take 24-48 hours for data to start showing in Google Analytics. So you may want to set a reminder to go check the reports in Google Analytics in a day or two.
This will start gathering information so you can make more informed decisions about how to improve your website, digital advertising, user experience, and ultimately drive more sales! If you’d like recommendations on next steps, be sure to inquire and ask us for a consultation.